

How Windows Are Tinted
Below You Will Find Instructions on How Windows are Tinted on a Vehicle.
These instructions pertain to film installation on an automobile, But the basic principles apply to installing film on residential and commercial glass windows.
First, we get the right tools for the job:
Heat gun.
Tinting squeegee (they come in long strips that you cut to shape.)
Spray bottles.
Hard card.
Apron or Pouch. (Holds tools for easy access.)
Cutting surface, preferably a piece of flat glass.
A snap-off razor blade knife (Stainless Steel Olfa blade.)
Razor blades.
We use a white abrasive sponge to clean the inside of an automobile’s back window.
Baby Shampoo (approx 10 drops per pint.)
Paper towels (preferably blue shop paper towels.)
Green masking tape. (Better adhesion than regular masking tape.)
Some hand tools (Removal of the brake light, etc., if necessary.)
Small stool.
![]()
The most crucial step is selecting the proper film for the job…
Numerous films are on the market today, but we use and recommend XPEL.
From the newest, top-of-the-line nano-ceramic, high-performance metallic hybrid, and even traditional dyed window tint options, there’s a PRIME ™ film for every application.
XPEL surpasses other types of window film to keep you comfortable and protected.
XPEL offers a lifetime transferable warranty backing all PRIME Window Tints.
[sc name=”quote”][/sc]
For how windows are tinted, let’s start with the basics…
We start with a clean car, if possible, and a wind-free environment for how windows are professionally tinted.
The tint is applied on the inside of the windows, but we prep the window film on the outside of the glass first to get the contour/shape of the glass.
Window film is installed inside the windows where it’s not directly exposed to the elements. Some films are applied to the exterior of a windshield, but for this post, we will focus on applying film to the interior of the glass.
We apply the film with soapy water, which triggers the adhesiveness of the film. (Film has a clear protective liner which you
remove to expose the adhesive glue before applying the film to the glass.)
Clean the glass in preparation.
Cleaning all the glass is an essential preparation step for how windows are tinted.
These next steps will help keep dirt particles to a minimum, which will mean much cleaner work.
Step One for How Windows are Tinted:
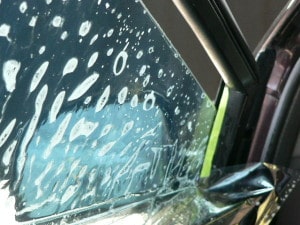
To heat shrink film, make sure the outside window glass is clean. Spray the outside glass several times with a spray bottle containing Baby Shampoo (approx 10 drops per pint.) and clean the outside window. Use a new razor blade. (Use long horizontal strokes.) The blades won’t scratch the glass if they are new and the window is wet.
Then place the film on the wet outside glass about one inch above the bottom of the window and about one inch to the left of the side felt.
Squeegee out the water from underneath the film, starting from a center point and moving to the outside edge to secure the film. (The film should still have the liner at this stage.)
Use the heat gun in an up-and-down motion to heat-shrink the film to the contour/shape of the window.
Make sure you do not apply too much heat and scorch the film. Once you have heat shrunk the film to the shape of the glass, remove it and place it on your clean glass surface. (Cutting surface area.)
The film will stick to the glass if you spray the glass liberally with soapy water.
Step Two of How Windows are Tinted:
Depending on the year, some vehicles have a felt edge on the doors that guides the window glass as it rolls up and down.
For this demonstration, we will include instructions for a felt-lined window.
When this felt gets wet, it ‘bleeds’ tiny black felt hairs which can stick to the film. These stand out when the film is dry.
To avoid this, follow the next set of instructions.
Open the car door. Position yourself so you are now facing the inside of the door.
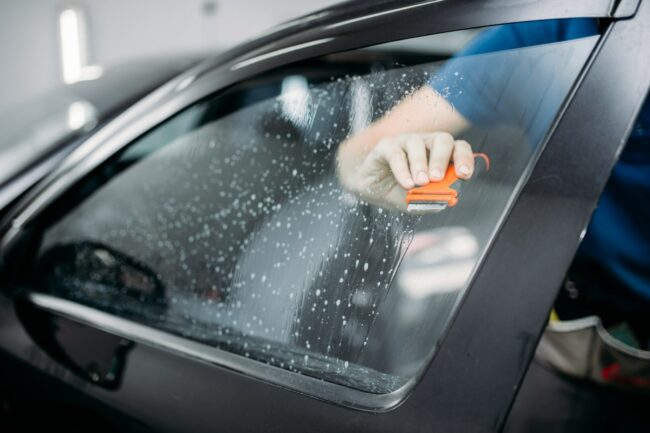
(A stool to sit on for comfort is helpful at this point) Roll the window as far down as it will go, then cover the felt with preferably green masking tape. Roll the window back up. Spray the windows down with soapy water (10 drops of Baby Shampoo per pint) and clean the window using a new razor blade. (Use long horizontal strokes.) The blades won’t scratch the glass if they are new and the window is wet. Repeat several times to remove all dirt particles from the window.
You will need to repeat this step for all the windows. (Clean each window just before it’s about to receive the film.) Spray the window again lightly, get a blue shop paper towel wrapped around the hard card, and wipe the edge of the glass and frame in a one-stroke motion to pick up the heavier dirt. Use another clean towel and wrap it around your squeegee. This time moisten the blue shop paper towel. A microfiber towel will also work and make one pass along the side of the window. Wipe your squeegee again, start at the dry side you just did, and squeegee sideways to the other side. Repeat until you reach the bottom. Then, the last stroke will be along the bottom edge of the window. The window should be completely clean and dry. Next, roll the window down about 2 inches from the top. Liberally spray the window, starting from the top down, with soapy water.
Finish by flushing the sides.
When spraying water, always start at the top and work your way down the window.
NOTE: Even after all this, it will still pick up dirt particles if you don’t handle the car tint carefully.
Step Three of How Windows are Tinted:
Applying the film.
Make sure the glass is wet before you apply the film. Standing at your glass cutting area, carefully remove the clear backing from the film to expose the adhesive.
Make sure the liner does not snag as you peel away the liner.
Liberally spray the adhesive surface with the solution as you remove the backing to protect the adhesive. Liberally wet both the adhesive surface of the film as well as the inside surface of the window with the soapy solution. Move the film into position inside the window, careful not to let it get creased or doubled over onto itself.
Place the film’s top edge on the window’s top edge from the inside of the glass.
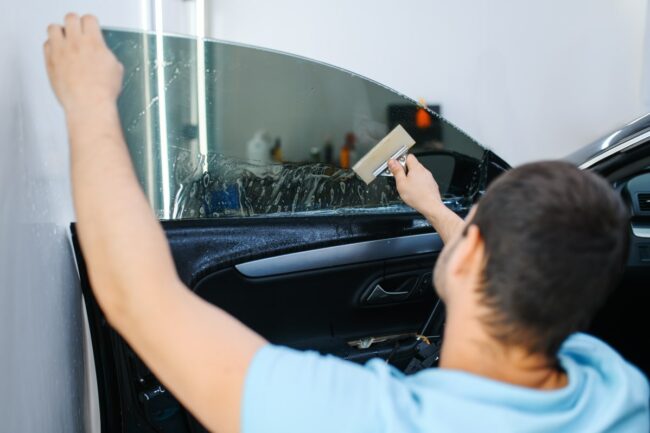
Start from the center of the window and squeegee using an outward stroke motion to secure the film to the glass. Do not secure the sides yet. Heat shrinks the window’s top edge using a horizontal motion to secure the film to the top of the window.
Roll up the window the remainder of the way.
Starting from the center again, secure the bottom section of the film to the glass near the gasket.
Using a triangle-shaped corner card, squeegee the last stroke down the edges of the window, and it depends on how tight the frame (gasket) is and how difficult this task may be. Take caution to not crease the corners. Spray the film and squeegee it again, more firmly this time, to remove excess water from under the film. Make sure the film does not slide.
Always start your strokes from the center of the glass (anchor point) to the outside edge. Blot any water from the sides with a hard card wrapped with a shop paper towel.
Step Four of How Windows are Tinted:
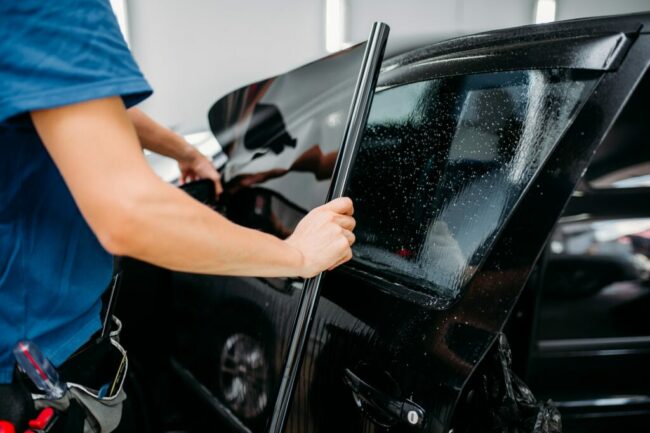
Back Window Glass: Use the heat shrinking method for the back window. This technique is very tricky and easy to mess up if you don’t know what you are doing.
Use new high-quality stainless steel razor blades to reduce unavoidable glass scratches. Try not to use carbon razor blades on the glass; they will almost certainly scratch it, especially on the outside! Most rear car windows have a compound curve, a curve on the horizontal plane, and a curve on the vertical plane.
Clean the outside of the back window. (Use the exact cleaning method for roll-up windows.) Spray the back window liberally and apply the film to the glass.
Use the heat gun in an up-and-down motion to heat-shrink the back window to the contour/shape of the window. This is a slow, careful process; gloves can be worn if necessary. (Heat shrinking a back window is exceptionally challenging, and applying a back window in one piece takes years of practice.) Use caution not to scorch the film with the heat gun.
Once you have heat shrunk the back window to the shape of the glass, remove the film and place it on your glass-cutting area.
(Spray the glass liberally, then the film will stick to the surface.)
Inside Back Window Glass;
Spray the inside of the glass with soapy water and scrub it with a white abrasive dish sponge, paying extra attention to the edges and the dotted areas. (Use a white dish scrubber, not a green one, as it will scratch the glass, or use Steel wool with 0000 grade.) Squeegee the glass dry and wipe the dotted edge with a shop paper towel to lift up the black residue the ceramic edge gives off, (This will help the film to stick to the dots.) Spray the window again, and squeegee carefully to remove the water. Now flush the window from the top down, avoiding the very top and the dots, if the window has them, to prevent dirt from bleeding.
Now, face your wet cutting glass surface. Carefully remove the liner from the film without it lying over onto itself (if the dry adhesive surface touches itself, you will need to start over as it will stick firmly). Liberally spray the adhesive surface with the solution as you remove the liner to protect the adhesive.
Carefully climb inside the vehicle with your film outstretched in your arms, ensuring it does not come into contact with any other surface.
Apply the film using the same steps as for roll-up windows. Secure the film to the glass by anchoring the film at the center point of the glass and squeeging the film to the outside edges.
Always use long consistent strokes applying pressure to squeegee out water trapped between film and glass.
An Additional Option for How Windows are Tinted but NOT necessary.
Before applying the film, remove the rear deck and brake light IF NECESSARY!
This can help with the installation of rear window film. The back window is a large piece of film that can be awkward for a novice. Make sure you do not touch anything but the clean glass with the film, it’s not that easy, and if the felt from the rear deck is against the glass, the film will be challenging to reach and squeegee completely. Most cars only need to have the brake light removed.
Black Ceramic Dots:
Most newer cars have black ceramic trimming on the edge of the rear window.
Sometimes this ceramic has a straight edge and sometimes a dotted edge.
Usually, this dotted edge is only 1/4 inch wide or more, depending on the make and model of the vehicle. The window film usually won’t stick to these dots flush, so a pocket of air will trim the glass. On most cars, this isn’t very noticeable.
The problem is that some cars have a six-inch wide band of dots on the upper edge of the back window. If that is the case, the air pocket created is so large and uneven that it is very unattractive. The film does not have flexibility (too rigid, depending on the quality of the film.) One solution to the matrix dots is to apply black vinyl to this area.
Step Five of How Windows are Tinted: Final Step.
After you have applied the film to the doors, wait a little while before removing the green masking tape from the roll-up windows.
After all the film has been applied, some areas might pop up (fingers). Push them down with a hard card, then blot any excess water from the window film with a hard card wrapped in shop paper towels.
Note: Don’t be afraid to rehearse how you will get into the car without using your hands to hold the back window film. If you move the driver and passenger seats as far forward as possible, it allows for more room to work and easier access to climb inside the vehicle.
We hope you found these instructions on how windows are tinted useful.
If you have any questions or would like to learn more, please give us a call. Or drop us an email.
We pride ourselves on making sure you are 100% satisfied with the look and installation of your automotive window film.
That’s why so many customers trust us for their installation.
Check out our 5-star reviews on Google, Yelp, and Facebook.
Or give us a call to schedule your appointment today.
Modesto Shop – Phone: (209) 543-3800
Roseville Shop – Phone: (916) 888-8468
