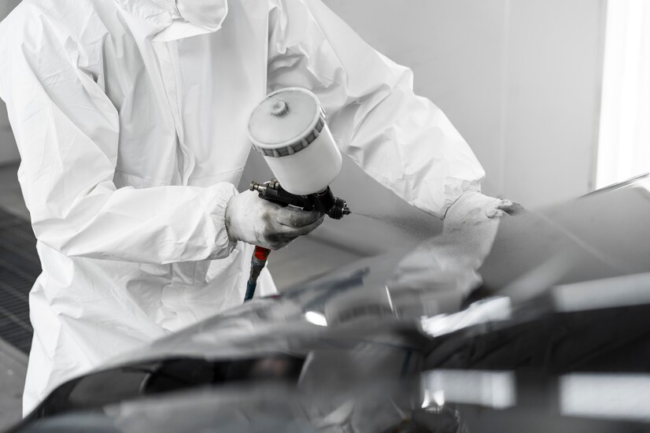
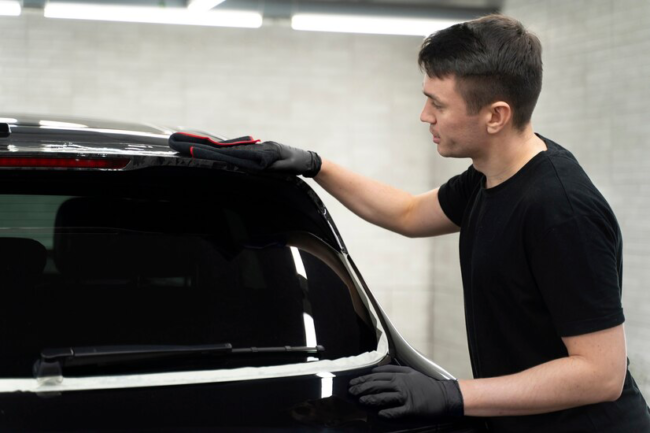
Are you frustrated with the swirl marks, scratches, and dullness plaguing your vehicle’s paint? Fear not, as there’s a solution: paint correction. In the world of automotive detailing, paint correction is the art of rejuvenating a vehicle’s paintwork to its former glory. It’s not merely about applying a layer of wax or polish; it’s a meticulous process that involves removing imperfections and restoring the shine and depth of your car’s finish.
Whether your vehicle is brand new or a cherished classic, paint correction can make a world of difference in its appearance. In this guide, we’ll delve into the fundamentals of paint correction, exploring the techniques, tools, and products needed to transform your car’s exterior. Get ready to embark on a journey toward a showroom-worthy shine!
Understanding Paint Imperfections
To master paint correction, it’s crucial to comprehend the various imperfections that can mar your vehicle’s finish. These imperfections often include swirl marks, scratches, water spots, oxidation, and holograms. Swirl marks are tiny circular scratches typically caused by improper washing techniques, while scratches can result from various factors like debris, improper buffing, or contact with abrasive materials.
Water spots occur when water droplets evaporate, leaving behind mineral deposits that etch into the paint surface. Oxidation, a common issue with older vehicles, causes the paint to fade and lose its luster over time. Holograms, also known as buffer trails, are wavy patterns caused by incorrect machine polishing techniques.
Understanding these imperfections is essential for effectively addressing them during the paint correction process, ensuring a flawless finish.
Assessing Your Vehicle’s Paintwork
 Before diving into the paint correction process, a thorough assessment of your vehicle’s paintwork is imperative. This involves closely examining the surface under different lighting conditions to identify imperfections such as swirls, scratches, haze, and oxidation.
Additionally, assessing the thickness of the paint layer using a paint thickness gauge helps determine the extent to which correction can be performed safely without risking damage to the paint. By evaluating the condition of the paintwork comprehensively, you can develop a tailored approach to address specific imperfections, ensuring optimal results while minimizing the risk of over-correction or causing further damage to the finish.
Essential Tools and Equipment for Paint Correction
When embarking on a paint correction journey, having the right tools and equipment at your disposal is essential for achieving professional-quality results. Key tools include dual-action polishers or rotary polishers, which are used to apply polishes and compounds effectively. Various polishing pads with different levels of aggressiveness are also necessary to address different types of imperfections.
Additionally, microfiber towels, detailing brushes, clay bars, and paint thickness gauges are indispensable for preparing the surface and ensuring precision during the correction process. Investing in high-quality tools and equipment not only enhances the efficiency of the correction process but also minimizes the risk of causing damage to the paintwork.
Choosing the Right Products: Polishes, Compounds, and Pads
Selecting the appropriate products is paramount for successful paint correction. Polishes, compounds, and pads come in different formulations and abrasive levels, catering to specific paint defects and surface conditions. Polishes contain fine abrasives designed to remove light imperfections and enhance gloss, while compounds feature more aggressive abrasives to tackle deeper scratches and oxidation.
Matching the right polish or compound with the correct pad is crucial for achieving optimal results without causing damage. Additionally, considering factors such as paint type, hardness, and condition is essential when choosing products to ensure compatibility and effectiveness.
By carefully selecting the right combination of products, you can streamline the correction process and achieve a flawless finish.
Step-by-Step Guide to Paint Correction Process
The paint correction process involves a series of systematic steps aimed at restoring the clarity, depth, and gloss of the vehicle’s paintwork. These steps typically include washing and decontaminating the surface to remove dirt, debris, and contaminants that could interfere with the correction process. Next, any imperfections such as swirls, scratches, or oxidation are addressed using the appropriate polish or compound and polishing pad combination. Multiple polishing passes may be required to achieve the desired level of correction.
Finally, the surface is inspected to ensure all imperfections have been effectively removed before applying a protective coating to preserve the newly restored finish. Following a structured step-by-step approach ensures thoroughness and consistency throughout the correction process, yielding professional-quality results.
Proper Techniques for Safe and Effective Correction
Mastering proper techniques is crucial for achieving safe and effective paint correction results. When using a polishing machine, maintaining consistent pressure and speed is essential to prevent uneven correction or overheating the paint. Working in small sections and overlapping each pass ensures thorough coverage and uniform correction.
Additionally, adjusting the machine’s speed and pad pressure based on the severity of imperfections and paint type helps minimize the risk of damaging the paintwork. Employing proper posture and grip techniques reduces fatigue and enhances control, allowing for precise correction even in hard-to-reach areas.
Regularly inspecting the work area and monitoring progress throughout the correction process helps identify any issues early on and make necessary adjustments to achieve optimal results safely.
Addressing Different Types of Paint Defects
Addressing different types of paint defects is a critical aspect of the paint correction process, ensuring a flawless finish for your vehicle. Understanding the nature of these defects enables targeted correction, resulting in a smoother and more aesthetically pleasing appearance. Here are some common types of paint defects and how to address them:
- Swirl Marks and Light Scratches: Use fine abrasives found in polishes to restore clarity and gloss.
- Deep Scratches and Oxidation: Employ more aggressive compounds to level the surface and remove imperfections effectively.
- Water Spots and Mineral Deposits: Apply chemical cleaners or mild abrasives like clay bars for effective removal.
- Holograms and Buffer Trails: Refine the surface with finer polishes and pads to eliminate traces of machine polishing.
- Paint Fading: Restore vibrancy and shine through a combination of polishing and protective coating applications.
Addressing different types of paint defects requires a tailored approach using appropriate techniques and products. By understanding these defects and employing the right methods, you can achieve a flawless finish that enhances the overall appearance of your vehicle.
Tips for Maximizing Results and Avoiding Common Mistakes
 Achieving professional-quality paint correction requires attention to detail and adherence to best practices. Working in a controlled environment with adequate lighting and temperature regulation ensures optimal visibility and product performance. Starting with the least aggressive approach and gradually increasing aggressiveness as needed minimizes the risk of over-correction and paint damage.
Using clean, high-quality tools and products prevents introducing additional defects during the correction process. Regularly inspecting the work surface and adjusting techniques as necessary helps maintain consistency and achieve desired results. Taking your time and working methodically, particularly on intricate areas, ensures thorough correction and a showroom-worthy finish.
Post-Correction Care: Protecting and Maintaining Your Finish
After completing the paint correction process, it’s crucial to implement post-correction care to preserve the newly restored finish and ensure its longevity. This involves taking proactive steps to protect and maintain the paintwork, safeguarding it against environmental contaminants and potential damage. Here are some essential tips for post-correction care:
- Apply a Protective Sealant or Ceramic Coating: Sealants and ceramic coatings provide durable protection against UV rays, oxidation, and environmental contaminants, extending the lifespan of the correction results.
- Regular Washing with Gentle Techniques: Utilize pH-balanced car wash products and gentle washing techniques to prevent the buildup of dirt and contaminants that could degrade the finish over time.
- Conduct Periodic Spot Correction: Keep an eye out for any new imperfections or blemishes and address them promptly with spot correction techniques to maintain the overall appearance of the paintwork.
- Reapply Protective Coatings as Needed: Over time, the protective properties of sealants and ceramic coatings may diminish. Reapply these coatings periodically to ensure continued protection and shine.
- Implement a Comprehensive Maintenance Routine: Develop a structured maintenance regimen that includes regular inspections, washing, spot correction, and reapplication of protective coatings to keep your vehicle’s finish looking its best.
Post-correction care is essential for preserving the results of paint correction and maintaining the beauty of your vehicle’s finish over time. By following these simple yet effective tips, you can ensure that your paintwork remains protected, glossy, and flawless for years to come.
Professional vs. DIY: Knowing When to Seek Professional Help
While many enthusiasts opt for a DIY approach to paint correction, there are instances where seeking professional assistance may be warranted. Complex paint defects, severe damage, or limited experience with correction techniques may necessitate the expertise of a professional detailer.
Professionals have access to advanced tools, products, and techniques, allowing them to tackle challenging imperfections effectively while minimizing the risk of causing further damage. Additionally, professional detailers possess the knowledge and experience to tailor correction processes to specific paint types and conditions, ensuring optimal results.
Ultimately, weighing the complexity of the correction needed, available time and resources, and personal skill level can help determine whether DIY or professional assistance is the best course of action for achieving desired paint correction outcomes.
achieving a flawless finish through paint correction requires a combination of understanding, assessment, and precise execution. By comprehending the various imperfections that can affect your vehicle’s paint, assessing its condition thoroughly, and employing the right tools, products, and techniques, you can transform its appearance dramatically.
From addressing swirl marks and scratches to choosing the appropriate products and executing the correction process step by step, attention to detail is paramount. Moreover, post-correction care plays a crucial role in maintaining the newly restored finish for the long term. Whether you opt for a DIY approach or seek professional assistance, prioritizing quality and precision ensures exceptional results. At Quality Auto Glass Tint, we’re dedicated to helping you achieve your auto glass aspirations with excellence. Contact us today to experience our unparalleled service and expertise firsthand!


